Here’s how to build a Java web server on Ubuntu Server. Please pay attention to changes in the author’s Ubuntu path when entering commands.
1. Install SSH (and Vim) on Ubuntu Server
If you purchased a server, SSH is usually pre-installed.
Obtain superuser privileges

Update package list

Install SSH

SSH should now be running.
2. Install Xshell and Create a Connection
Install Xshell
Establish a connection
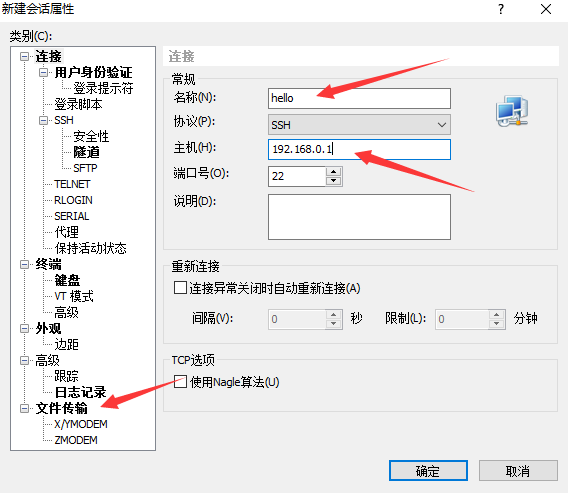
Click OK to connect.
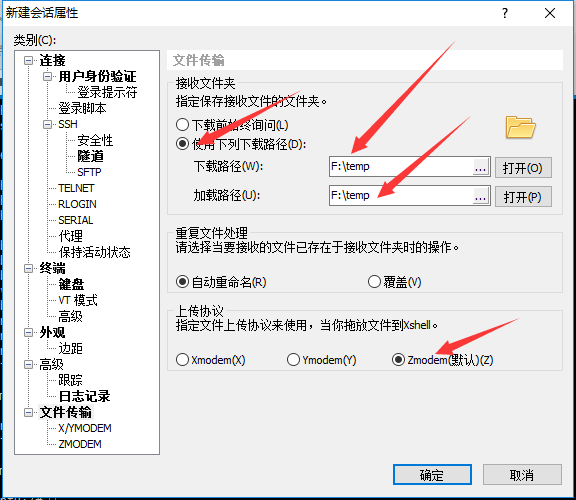
3. Xshell: Upload/Download Files to Ubuntu
3.1 Upload Files
Obtain superuser privileges

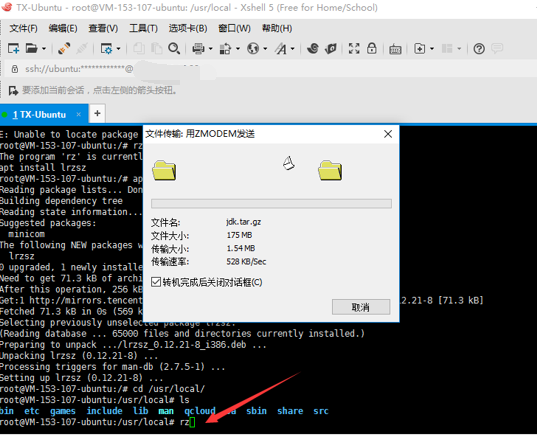
Install rz/sz tools

Navigate to the target directory and run rz
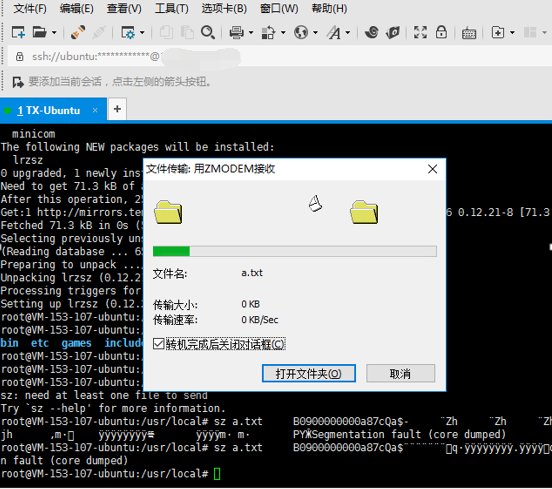
3.2 Download Files
Navigate to the target directory and run sz filename

4. Install MySQL with Root Privileges
Install these three packages:
1. apt-get install mysql-server
2. apt-get install mysql-client
3. apt-get install libmysqlclient-dev
Test MySQL login
mysql -u root -p
-uspecifies the username,-pspecifies the password.

5. Install JDK
Upload the JDK file to /usr/local/

Extract the file

Delete the original file

Rename the folder

Set environment variables
Open /etc/profile with Vim:

Add these lines:
JAVA_HOME=/usr/local/jdk
PATH=$JAVA_HOME/bin:$PATH:.
CLASSPATH=$JAVA_HOME/lib/dt.jar:$JAVA_HOME/lib/tools.jar:.
export JAVA_HOME
export PATH
export CLASSPATH
- Save and exit Vim: Press
Esc, then:wq.
Apply changes

Verify JDK installation

6. Install Tomcat
Upload the Tomcat file to /usr/local/

Extract the file

Delete the original file

Rename the folder

Set environment variables
Open /etc/profile with Vim and add:
CATALINA_HOME=/usr/local/tomcat
PATH=$CATALINA_HOME/bin:$PATH:.
export CATALINA_HOME
export PATH
Apply changes

Start Tomcat

Check logs

Tomcat started successfully

7. Deploy a Website
Upload files to Tomcat’s webapps directory

Install unzip

Unzip the package
unzip your_package.zip

8. Configure Default Website Path
Open Tomcat’s context.xml (or server.xml):

Add this line:
<Context path="" docBase="/usr/local/tomcat/webapps/firstweb" debug="0" reloadable="true"/>
Restart Tomcat

9. Install phpMyAdmin
Install Apache2

Modify Apache port (default 80 conflicts with Tomcat)

Change to 8022:

Start Apache

Install phpMyAdmin

Associate with Apache

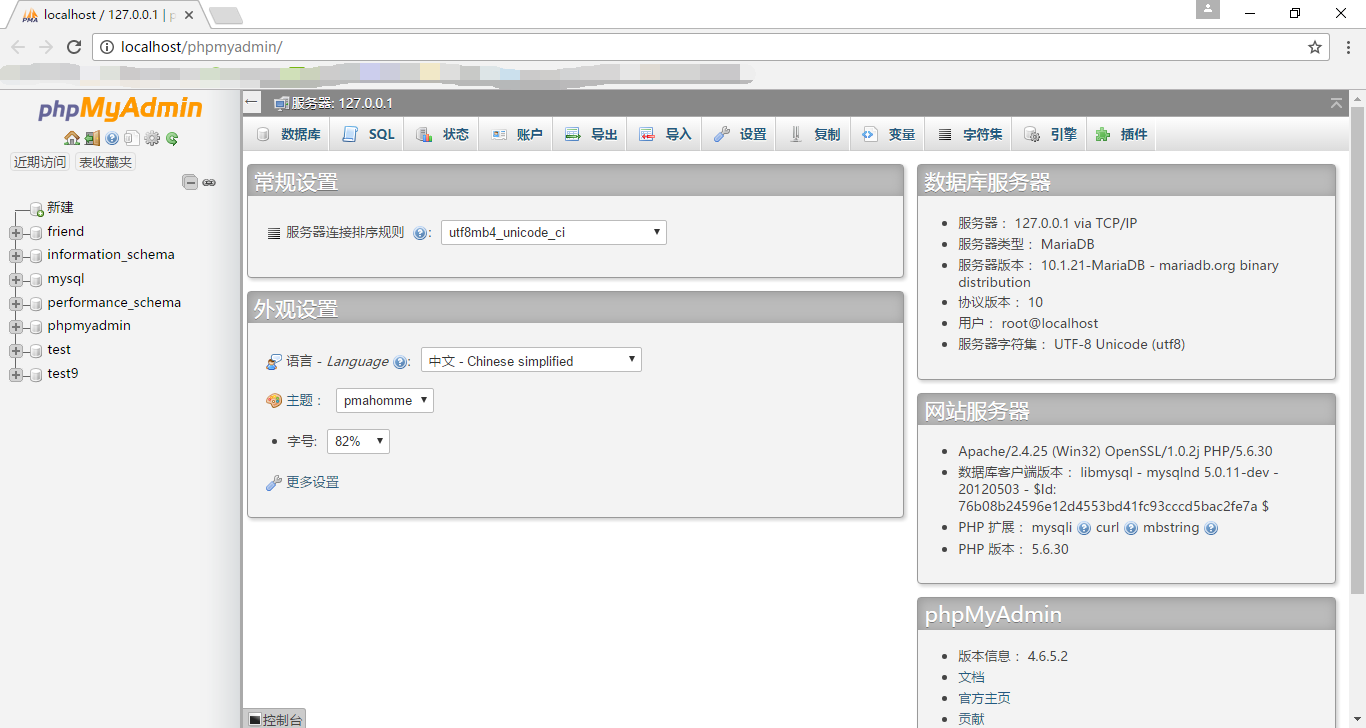
Access phpMyAdmin
In the browser: http://localhost:8022/phpmyadmin/
10. Optimize Tomcat Startup Speed
Edit catalina.sh in tomcat/bin/:
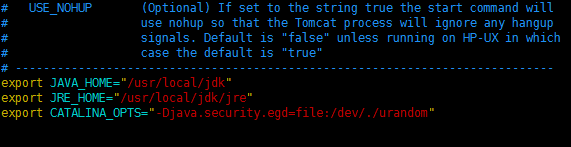
Add these lines at the top:
export JAVA_HOME="/usr/local/jdk"
export JRE_HOME="/usr/local/jdk/jre"
export CATALINA_OPTS="-Djava.security.egd=file:/dev/./urandom"
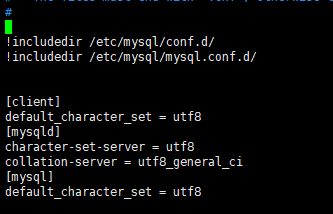
Fix MySQL Chinese Garbled Text
MySQL configuration path

Add to the configuration file:
[client]
default-character-set = utf8
[mysqld]
character-set-server = utf8
collation-server = utf8_general_ci
[mysql]
default-character-set = utf8
Restart MySQL
/etc/init.d/mysql restart
That’s it! Your Java web server on Ubuntu is now fully set up.