Foreword
TNN: A high-performance, lightweight inference framework for mobile devices developed by Tencent Youtu Lab. It boasts cross-platform support, high performance, model compression, code customization, and other outstanding advantages. Building on the original Rapidnet and ncnn frameworks, TNN further enhances mobile device support and performance optimization while incorporating the high performance and excellent scalability of mainstream open-source frameworks in the industry.
Tutorial Source Code Address: https://github.com/yeyupiaoling/ClassificationForAndroid/tree/master/TNNClassification
Compile Android Library
- Install CMake 3.12
# Uninstall old CMake
sudo apt-get autoremove cmake

# Download CMake 3.12
wget https://cmake.org/files/v3.12/cmake-3.12.2-Linux-x86_64.tar.gz
tar zxvf cmake-3.12.2-Linux-x86_64.tar.gz

# Move directory and create soft link
sudo mv cmake-3.12.2-Linux-x86_64 /opt/cmake-3.12.2
sudo ln -sf /opt/cmake-3.12.2/bin/* /usr/bin/
- Add Android NDK
wget https://dl.google.com/android/repository/android-ndk-r21b-linux-x86_64.zip
unzip android-ndk-r21b-linux-x86_64.zip
# Add environment variable (please note your actual download path)
export ANDROID_NDK=/mnt/d/android-ndk-r21b
- Install build environment
sudo apt-get install attr
- Start compilation
git clone https://github.com/Tencent/TNN.git
cd TNN/scripts

vim build_android.sh
ABIA32="armeabi-v7a"
ABIA64="arm64-v8a"
STL="c++_static"
SHARED_LIB="ON"                # ON for dynamic library, OFF for static library
ARM="ON"                       # ON for Arm CPU version
OPENMP="ON"                    # ON to enable OpenMP
OPENCL="ON"                    # ON for Arm GPU version
SHARING_MEM_WITH_OPENGL=0      # 1 to share OpenGL Texture with OpenCL
Execute compilation
./build_android.sh
After successful compilation, the corresponding armeabi-v7a library, arm64-v8a library, and include header files will be generated in the release directory of the current location. These files are required for the next steps of Android development.
Model Conversion
Next, we need to convert models from TensorFlow, ONNX, and other formats to TNN models. TNN currently supports mainstream model formats including ONNX, PyTorch, TensorFlow, and Caffe. TNN uses ONNX as an intermediate layer, leveraging the open-source community to support multiple model formats. To convert models like PyTorch, TensorFlow, or Caffe to TNN, first use the corresponding conversion tools to convert them to ONNX format, then convert the ONNX model to TNN format.
sudo docker pull turandotkay/tnn-convert
sudo docker tag turandotkay/tnn-convert:latest tnn-convert:latest
sudo docker rmi turandotkay/tnn-convert:latest
Different commands are required for different model conversions, such as onnx2tnn, caffe2tnn, tf2tnn.
docker run --volume=$(pwd):/workspace -it tnn-convert:latest python3 ./converter.py tf2tnn \
    -tp /workspace/mobilenet_v1.pb \
    -in "input[1,224,224,3]" \
    -on MobilenetV1/Predictions/Reshape_1 \
    -v v1.0 \
    -optimize
From the output above, we can see that the convert2tnn tool provides many parameters for TF model conversion. Let’s explain these parameters:
-
tp parameter (required)
Specify the path to the model using the “-tp” parameter. Currently, only single TF model conversion is supported, not multiple models. -
in parameter (required)
Specify the model input name with the “-in” parameter, enclosed in quotes, e.g., “-in “name”“. For multiple inputs, use “;” to separate. Some TensorFlow models may lack batch size specification, causing conversion failure. You can add input shape in the name, e.g., “-in “name[1,28,28,3]”“. -
on parameter (required)
Specify the model output name with the “-on” parameter. For multiple outputs, use “;” to separate. -
output_dir parameter
Specify output path with “-o“. In Docker, the default output path is the same as the model path. -
optimize parameter (optional)
Enable model optimization with “-optimize”. We strongly recommend enabling this option. Only try without it if conversion fails. -
v parameter (optional)
Specify model version with “-v” for version tracking. -
half parameter (optional)
Store model data in FP16 with “-half” to reduce size (default: FP32). -
align parameter (optional)
Align TNN model with original model (FP32 only, cannot use with “-half”). Supports single/multi-output models. -
input_file parameter (optional)
Specify input file for alignment (format: reference). -
ref_file parameter (optional)
Specify output file for alignment (format: reference). Code to generate output is available here.
Successful conversion will show:
----------  convert model, please wait a moment ----------

Converter Tensorflow to TNN model

Convert TensorFlow to ONNX model succeed!

Converter ONNX to TNN Model

Converter ONNX to TNN model succeed!
The final model files will be: mobilenet_v1.opt.tnnmodel and mobilenet_v1.opt.tnnproto.
Develop Android Project
- Place converted models in the
assetsdirectory. - Copy the
includedirectory from the previous compilation to theappdirectory of the Android project. - Copy the
armeabi-v7aandarm64-v8adirectories tomain/jniLibs. - Write JNI C++ code in
app/src/main/cpp/.
TNN Tool
Create an ImageClassifyUtil.java utility class for TNN operations like model loading and prediction.
The following are the TNN JNI interfaces for model loading, prediction, and resource cleanup:
public native int init(String modelPath, String protoPath, int computeUnitType);

public native float[] predict(Bitmap image, int width, int height);

public native int deinit();
Implement image recognition using these JNI interfaces. WIDTH and HEIGHT define the input image size for the model. Overload methods handle both image paths and Bitmap inputs:
private static final int WIDTH = 224;
private static final int HEIGHT = 224;

public ImageClassifyUtil() {
    System.loadLibrary("TNN");
    System.loadLibrary("tnn_wrapper");
}

// Overload: Predict from image path
public float[] predictImage(String image_path) throws Exception {
    if (!new File(image_path).exists()) {
        throw new Exception("image file is not exists!");
    }
    FileInputStream fis = new FileInputStream(image_path);
    Bitmap bitmap = BitmapFactory.decodeStream(fis);
    Bitmap scaleBitmap = Bitmap.createScaledBitmap(bitmap, WIDTH, HEIGHT, false);
    float[] result = predictImage(scaleBitmap);
    if (bitmap.isRecycled()) {
        bitmap.recycle();
    }
    return result;
}

// Overload: Predict from Bitmap
public float[] predictImage(Bitmap bitmap) {
    Bitmap scaleBitmap = Bitmap.createScaledBitmap(bitmap, WIDTH, HEIGHT, false);
    float[] results = predict(scaleBitmap, WIDTH, HEIGHT);
    int label = getMaxResult(results);
    return new float[]{label, results[label] * 0.01f};
}
Function to get the maximum probability label:
public static int getMaxResult(float[] result) {
    float probability = 0;
    int label = 0;
    for (int i = 0; i < result.length; i++) {
        if (probability < result[i]) {
            probability = result[i];
            label = i;
        }
    }
    return label;
}
Image preprocessing (C++ code snippet):
TNN_NS::MatConvertParam input_cvt_param;
input_cvt_param.scale = {1.0 / (255 * 0.229), 1.0 / (255 * 0.224), 1.0 / (255 * 0.225), 0.0};
input_cvt_param.bias  = {-0.485 / 0.229, -0.456 / 0.224, -0.406 / 0.225, 0.0};
auto status = instance_->SetInputMat(input_mat, input_cvt_param);
Select Image for Prediction
The demo includes two pages: one for selecting images and another for real-time camera prediction. Here’s the activity_main.xml layout:
<?xml version="1.0" encoding="utf-8"?>
<RelativeLayout xmlns:android="http://schemas.android.com/apk/res/android"
    xmlns:app="http://schemas.android.com/apk/res-auto"
    xmlns:tools="http://schemas.android.com/tools"
    android:layout_width="match_parent"
    android:layout_height="match_parent"
    android:orientation="vertical"
    tools:context=".MainActivity">

    <ImageView
        android:id="@+id/image_view"
        android:layout_width="match_parent"
        android:layout_height="400dp" />

    <TextView
        android:id="@+id/result_text"
        android:layout_width="match_parent"
        android:layout_height="wrap_content"
        android:layout_below="@id/image_view"
        android:text="识别结果"
        android:textSize="16sp" />


    <LinearLayout
        android:layout_width="match_parent"
        android:layout_height="wrap_content"
        android:layout_alignParentBottom="true"
        android:orientation="horizontal">

        <Button
            android:id="@+id/select_img_btn"
            android:layout_width="0dp"
            android:layout_height="wrap_content"
            android:layout_weight="1"
            android:text="选择照片" />


        <Button
            android:id="@+id/open_camera"
            android:layout_width="0dp"
            android:layout_height="wrap_content"
            android:layout_weight="1"
            android:text="实时预测" />

    </LinearLayout>

</RelativeLayout>
In MainActivity.java, load models from the assets directory (copy to cache first) and read labels from label_list.txt:
classNames = Utils.ReadListFromFile(getAssets(), "label_list.txt");
String protoContent = getCacheDir().getAbsolutePath() + File.separator + "squeezenet_v1.1.tnnproto";
Utils.copyFileFromAsset(MainActivity.this, "squeezenet_v1.1.tnnproto", protoContent);
String modelContent = getCacheDir().getAbsolutePath() + File.separator + "squeezenet_v1.1.tnnmodel";
Utils.copyFileFromAsset(MainActivity.this, "squeezenet_v1.1.tnnmodel", modelContent);

imageClassifyUtil = new ImageClassifyUtil();
int status = imageClassifyUtil.init(modelContent, protoContent, USE_GPU ? 1 : 0);
if (status == 0) {
    Toast.makeText(MainActivity.this, "模型加载成功!", Toast.LENGTH_SHORT).show();
} else {
    Toast.makeText(MainActivity.this, "模型加载失败!", Toast.LENGTH_SHORT).show();
    finish();
}
Handle button clicks to open the gallery or camera:
Button selectImgBtn = findViewById(R.id.select_img_btn);
Button openCamera = findViewById(R.id.open_camera);
ImageView imageView = findViewById(R.id.image_view);
TextView resultText = findViewById(R.id.result_text);

selectImgBtn.setOnClickListener(v -> {
    Intent intent = new Intent(Intent.ACTION_PICK);
    intent.setType("image/*");
    startActivityForResult(intent, 1);
});

openCamera.setOnClickListener(v -> {
    Intent intent = new Intent(MainActivity.this, CameraActivity.class);
    startActivity(intent);
});
Process gallery image selection and prediction:
@Override
protected void onActivityResult(int requestCode, int resultCode, @Nullable Intent data) {
    super.onActivityResult(requestCode, resultCode, data);
    if (resultCode == Activity.RESULT_OK && requestCode == 1) {
        Uri imageUri = data.getData();
        String imagePath = getPathFromURI(this, imageUri);
        try {
            FileInputStream fis = new FileInputStream(imagePath);
            imageView.setImageBitmap(BitmapFactory.decodeStream(fis));
            long start = System.currentTimeMillis();
            float[] result = imageClassifyUtil.predictImage(imagePath);
            long end = System.currentTimeMillis();
            String showText = "预测结果标签:" + (int) result[0] +
                    "\n名称:" + classNames[(int) result[0]] +
                    "\n概率:" + result[1] +
                    "\n时间:" + (end - start) + "ms";
            resultText.setText(showText);
        } catch (Exception e) {
            e.printStackTrace();
        }
    }
}

public static String getPathFromURI(Context context, Uri uri) {
    String result;
    Cursor cursor = context.getContentResolver().query(uri, null, null, null, null);
    if (cursor == null) {
        result = uri.getPath();
    } else {
        cursor.moveToFirst();
        int idx = cursor.getColumnIndex(MediaStore.Images.ImageColumns.DATA);
        result = cursor.getString(idx);
        cursor.close();
    }
    return result;
}
Real-time Camera Prediction
The real-time camera prediction implementation follows similar principles. Core code for continuous inference:
private Runnable periodicClassify = new Runnable() {
    @Override
    public void run() {
        synchronized (lock) {
            if (runClassifier) {
                if (getApplicationContext() != null && mCameraDevice != null && mnnClassification != null) {
                    predict();
                }
            }
        }
        if (mInferThread != null && mInferHandler != null) {
            mInferHandler.post(periodicClassify);
        }
    }
};

private void predict() {
    Bitmap bitmap = mTextureView.getBitmap();
    try {
        long start = System.currentTimeMillis();
        float[] result = imageClassifyUtil.predictImage(bitmap);
        long end = System.currentTimeMillis();
        String showText = "预测结果标签:" + (int) result[0] +
                "\n名称:" + classNames[(int) result[0]] +
                "\n概率:" + result[1] +
                "\n时间:" + (end - start) + "ms";
        resultText.setText(showText);
    } catch (Exception e) {
        e.printStackTrace();
    }
}
Add permissions to AndroidManifest.xml:
<uses-permission android:name="android.permission.CAMERA"/>
<uses-permission android:name="android.permission.READ_EXTERNAL_STORAGE"/>
<uses-permission android:name="android.permission.WRITE_EXTERNAL_STORAGE"/>
For Android 6+, request permissions dynamically:
private boolean hasPermission() {
    if (Build.VERSION.SDK_INT >= Build.VERSION_CODES.M) {
        return checkSelfPermission(Manifest.permission.CAMERA) == PackageManager.PERMISSION_GRANTED &&
                checkSelfPermission(Manifest.permission.READ_EXTERNAL_STORAGE) == PackageManager.PERMISSION_GRANTED &&
                checkSelfPermission(Manifest.permission.WRITE_EXTERNAL_STORAGE) == PackageManager.PERMISSION_GRANTED;
    } else {
        return true;
    }
}

private void requestPermission() {
    if (Build.VERSION.SDK_INT >= Build.VERSION_CODES.M) {
        requestPermissions(new String[]{
                Manifest.permission.CAMERA,
                Manifest.permission.READ_EXTERNAL_STORAGE,
                Manifest.permission.WRITE_EXTERNAL_STORAGE
        }, 1);
    }
}
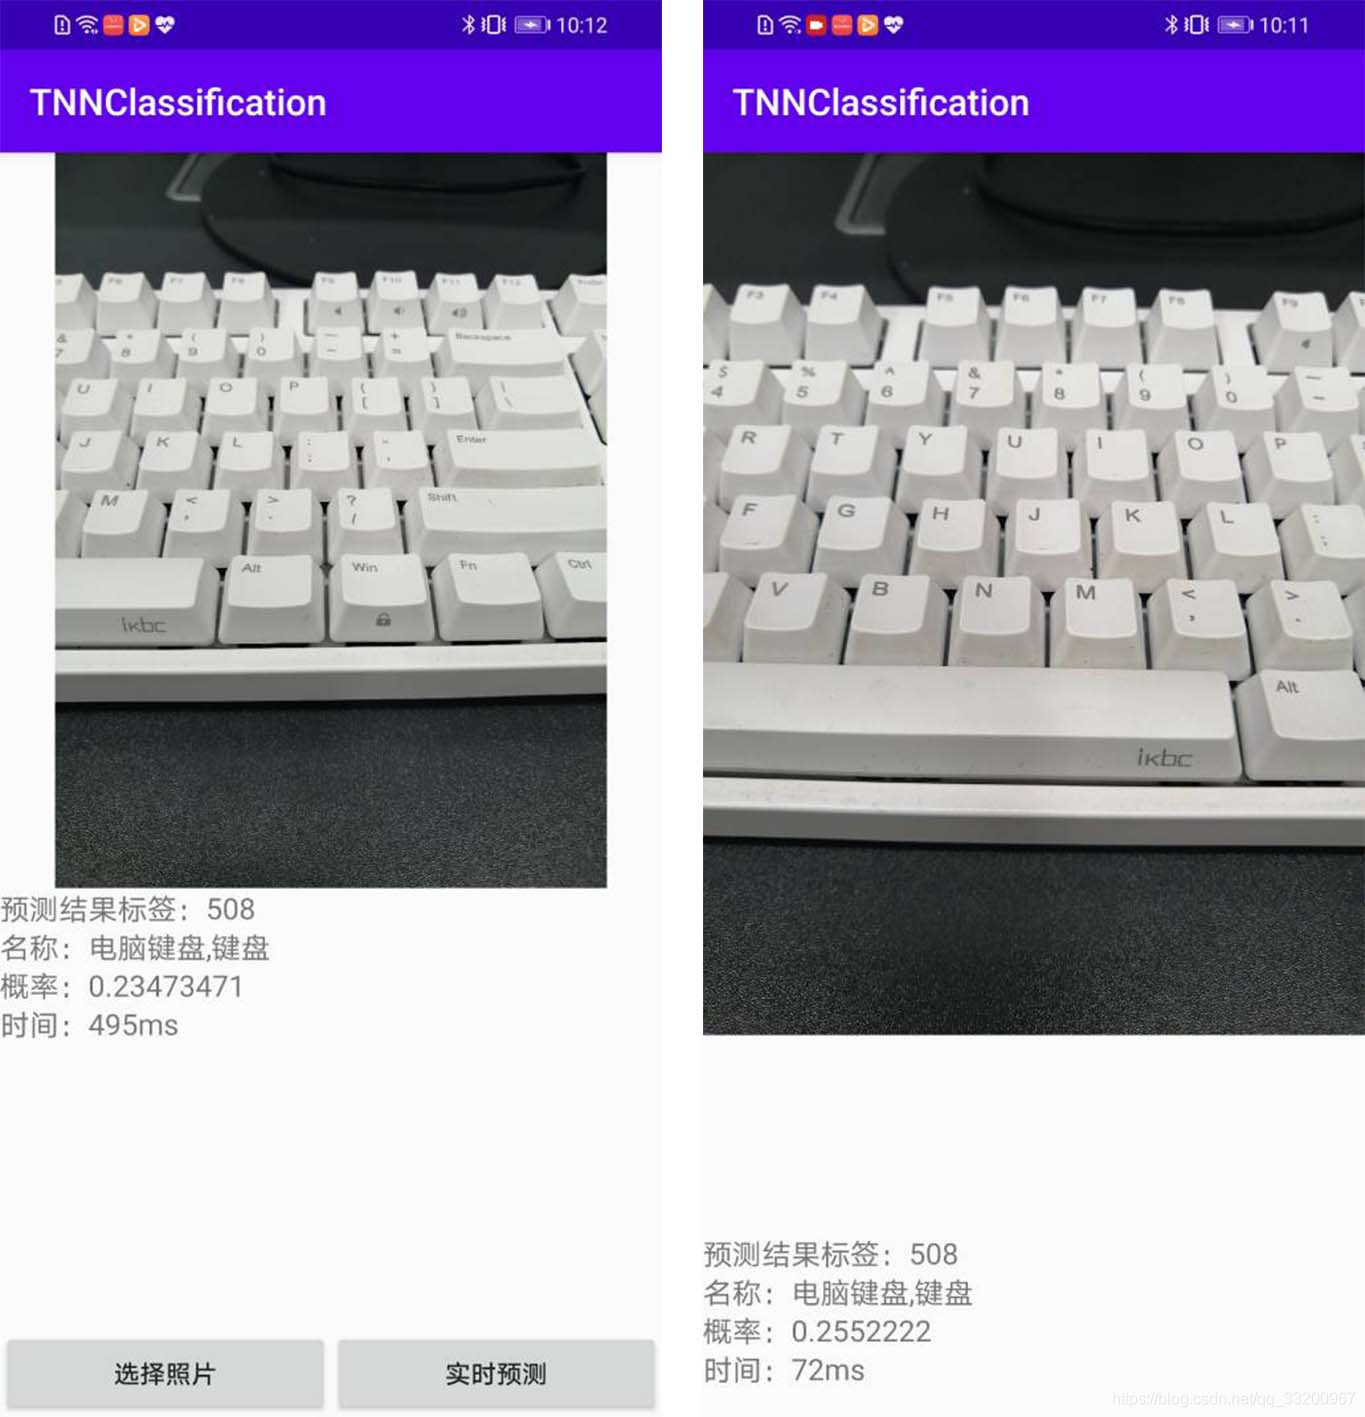
Demo Screenshot: